Make Your Own Custom Bottle Labels
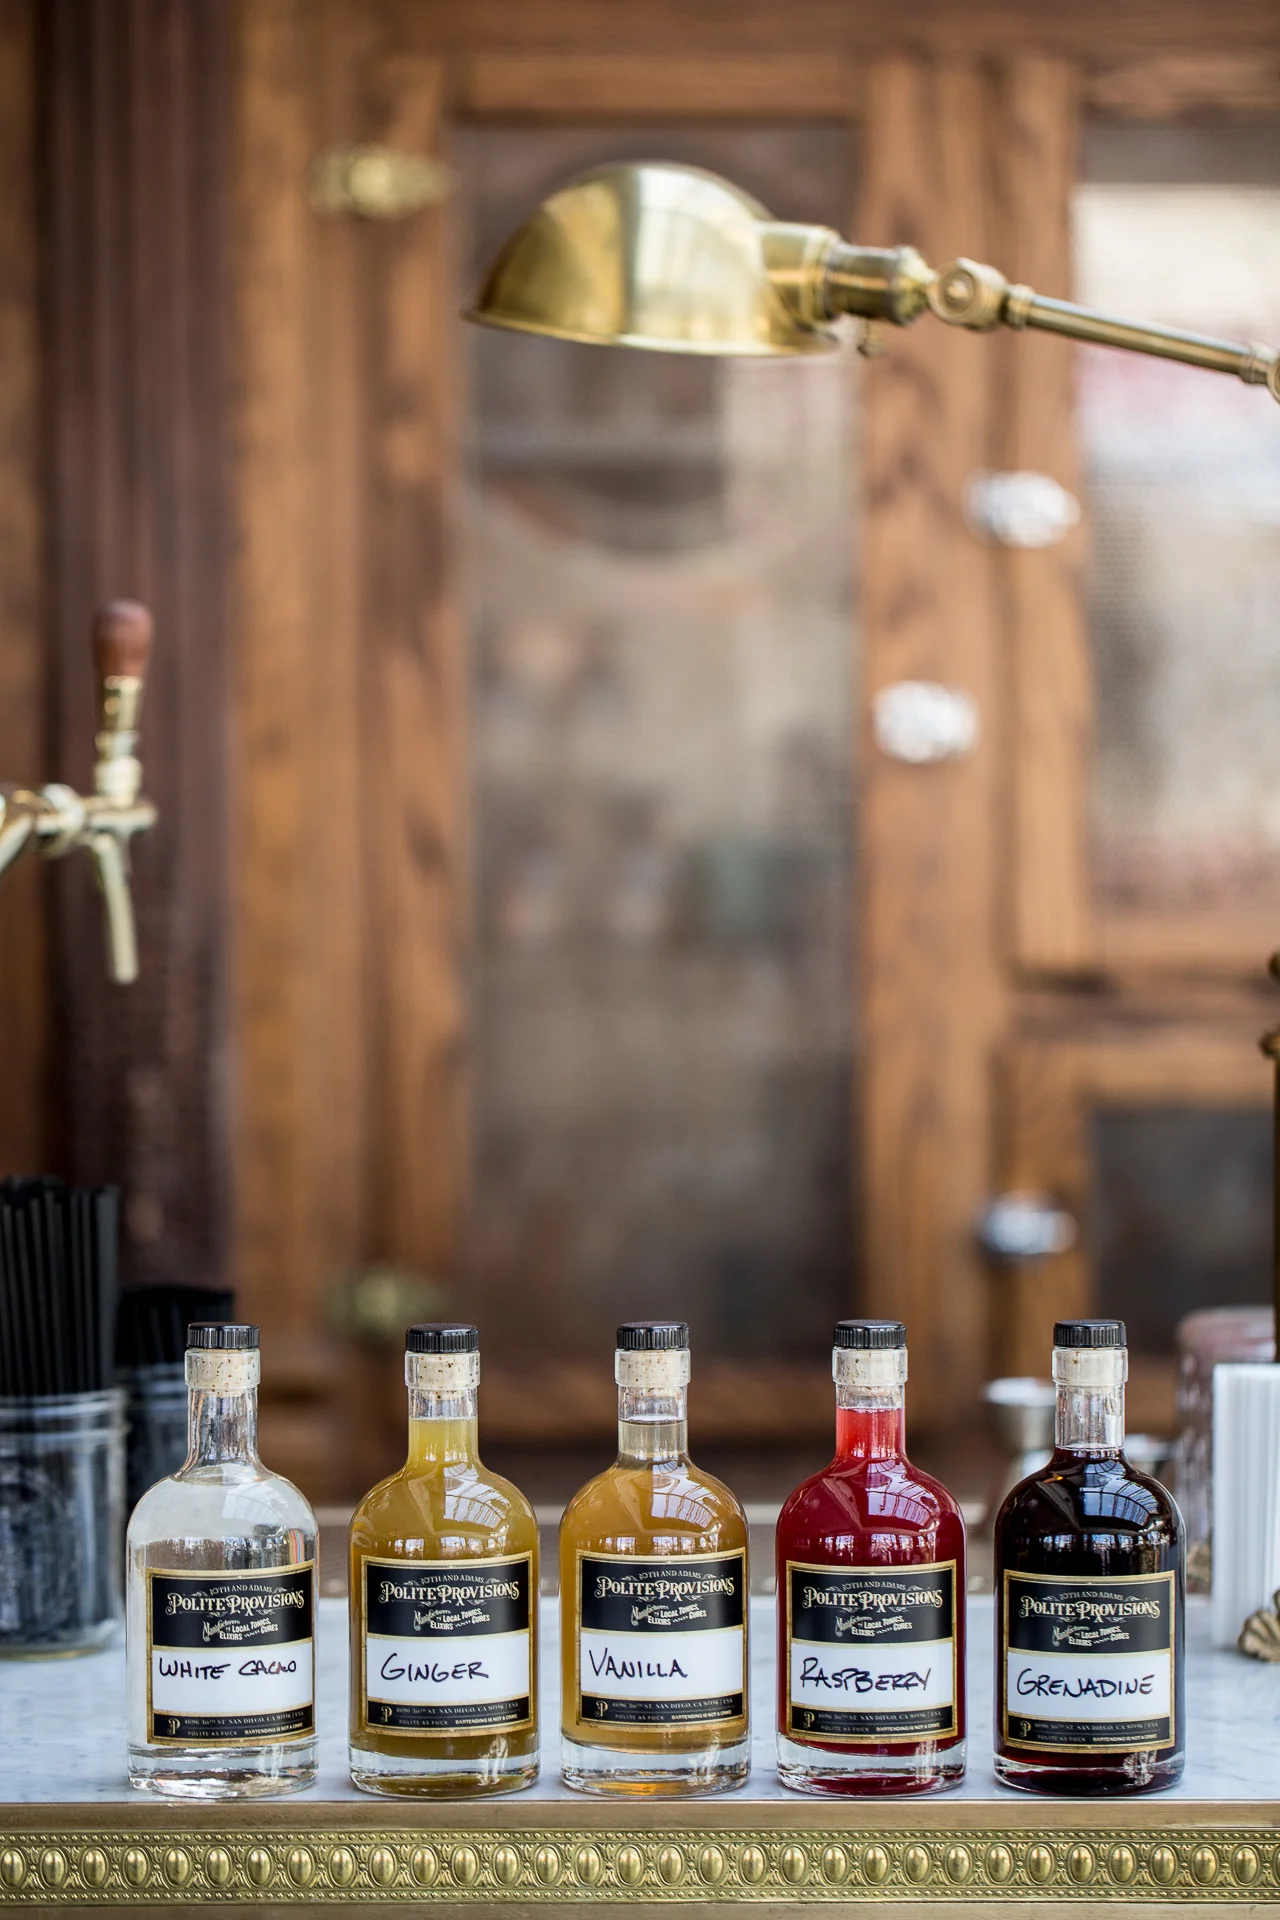
Photo by Arlene Ibarra
The one thing that out of town bartenders always ask when they come to Polite Provisions or Raised by Wolves is where we get our custom bottle labels at. As you can see from the photo above, we use proprietary stickers on our syrups and juices as opposed to blue label tape and marker. We think that it lends a more polished and professional look. In fact, they end up looking like something that you are proud to show off to guests, rather than hide down in the rail. It’s not like most of us are eager to live by the adage, “labels out,” when you are simply pouring lemon juice, right?
But its not just that we love the labels for aesthetics, they are also far less wasteful than conventional label tape. Since they are printed on all-weather labels, designed for harsh outdoor conditions, they can last for years, so instead of replacing blue tape every single night, you put one sticker on the bottle and it stays in place indefinitely. You can run them through the dishwasher, soak them in salt baths, etc, and the labels never come off.
They last so long that we ordered 400 of them back in 2016 for $152 bucks, and we have only had to reorder once since then. I have never ran the numbers, but due to the durability, I would wager that they might actually save you money, as opposed to blowing through blue painter’s tape all of the time. So to recap, they are less wasteful, easier to read, require less maintenance, and probably cost less, but if that wasn’t enough, let’s go ahead and say it, they look sick AF.
Getting them printed up is super easy, but for the sake of simplicity, I will go ahead and break it down how to get them made. As I mentioned earlier, we get them printed on all-weather stickers, in order to make sure that they can take a beating. We get these done at StickerMule.com, but I am sure that other places can get them made just as well.
We print the labels with one sticker for the front, indicating what is in the bottle, with a back label as well with a logo for the bar. This way the bottle looks great from both the front & the back, so that no matter which way the bottle is facing the guest is able to glimpse the bottle from a visually appealing perspective, as you can see from the photo below.

Photo by Brogen Jessup
During testing, we tried many different label sizes, but we were most happy with the side for writing the contents of the bottle at 3.25" x 2.75,” and the logo side either having the same measurement or a bit smaller at or the logo side being 3.75" x 1.73.” It really all depends on the dimensions of your logo. However, your mileage may vary, depending on what kind of bottles you use. For your reference though, we use heavy base 375ml bottles for most of our syrups —and the ubiquitous empty wine bottle for our juices—and the labels fit perfectly on both. In fact, for some of our less used syrups, we pour from 8.5oz bottles and the labels still look great on those as well.
Although, we started with an order of 400 (per side) for each bar, keep in mind that both bars are pretty high-volume with four wells behind the bar, each with an array of syrups, batches, juices, etc, so there is a good chance that you could get by with a much smaller order, particularly, when you consider that the labels can last several years. However, if you are part of hospitality group, there is a good chance that you could use the same label at all of your locations and perhaps go with a much larger order.
Before I let you go, I will leave you with a few tips first to save you any headaches, so here they are:
For the actual sticker design, I would recommend getting someone from your design team (or a maybe even a bartender/designer like Amanda Elder) to create them for you (with the required measurements,) unless you are quite adept with Adobe Illustrator or something comparable. As I mentioned earlier, you will be looking at these for potentially years to come, so you want them to look good, while still matching the overall aesthetics of the bar.
When you decide to write the contents of the bottle on the labels, be sure to find the staff member with the best penmanship to handle that aspect. As, I said above there is a good chance that you are going to be looking at these labels for a longtime, so you want them looking good. Trust me, I have terrible handwriting and would never wish to subject a poor customer to that while they are trying to enjoy a cocktail.
Figure out where the labels will be positioned on the bottle, so that all of the bottles are uniform in their placement. You don’t the bottles to be lined up with the stickers placed willy-nilly on the bottles, as this will not be pleasing aesthetically. This is why you might prefer to have one person adhere all of the stickers to the bottle, or maybe even have one bottle serve as reference for those placing the stickers.
Make sure that the bottles are bone dry before you place the sticker on it. You don’t want to waste a sticker on a bottle or have it peel off a couple of days later, because the bottle was still damp and sticky.
That should cover just about everything that I can think of, but please don’t hesitate to leave a comment below, if you happen to have any questions.